
Flower Pot Easter Card Page 2
Open a new image, 397 x 652, transparent background.
*Add a new raster layer.*
Load my flower pot Easter card selection. ("Selections"..."Load from Disk"..."wompieflowerpotcard"..."OK")
Use your airbrush tool to fill in the selection outline. I used the color
#ACD1CE with my airbrush tool set to these settings:
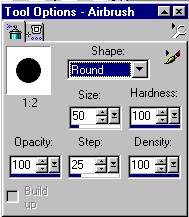
De-select. ("Ctrl"..."D")
Use your magic wand tool and click inside one of the large areas of the pot.
Hold the "Shift" key down and click inside the other large area. Both of the
large areas should now be selected. I used these settings for my magic wand:
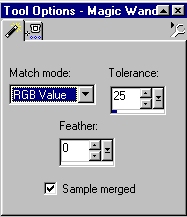
*Add a new raster layer.*
With the selections still active, flood fill the selections in your new layer
with the plaid tile or a tile of your choosing. De-select.
In your layer palette, click on the layer with the outline of your card in it to
make it active. (This should be Layer 2.) Use your magic wand and "Shift" key
again to select the three rectangular flower pot borders:
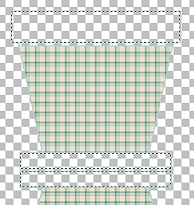
*Add a new raster layer.*
Flood-fill with the same color (#ACD1CE) we used for our outline. While still
selected, apply the "faded mosaic" pre-set from Fantastic Machine's Paint
Engine. Here are the settings:
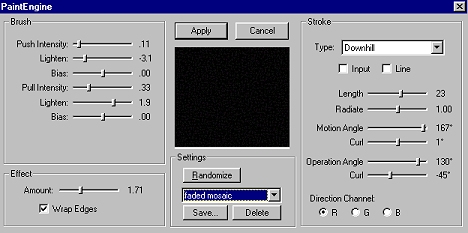
De-select.
In your layer palette, click on the layer with the outline of your card in it to
make it active. (This should be Layer 2.) Use your magic wand and "Shift" key
again to select the two lines on the flower pot. (one under the top ridge and
one on the fold of the card) Flood-fill these with your solid color. (#ACD1CE)
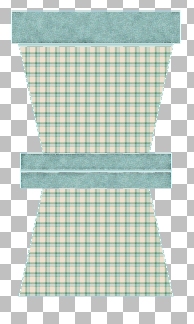
This is your basic card and should look something like this:
(image re-sized for faster loading)
Now, let's decorate! Follow wompie!

