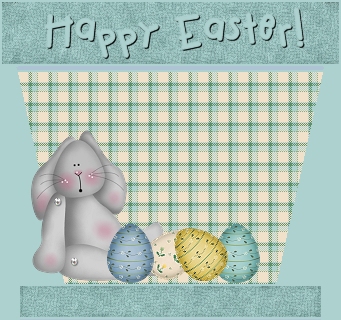
Flower Pot Easter
Card Page 3
From your layer palette, select the top layer.
*Add a new raster layer.*
(Fast way: Hold down the "Shift" key and click on the two little pieces of paper
in your layer palette.)
Apply Jane's bunny tube (or a tube of your choice) at 50%. Sharpen once.
("Effects"..."Sharpen"..."Sharpen")
This next step is only necessary if your tubes go outside of the flower pot
design and simply makes the card easier to cut out.
In your bunny layer, select all. ("Selections"..."Select All") Then float.
("Selections"..."Float") Expand by 6 pixels.
("Selections"..."Modify"..."Expand"..."Expand by 6 pixels")
*Add a new raster layer.*
Flood-fill the selection with your solid color.
(#ACD1CE)
Contract the selection by 2 pixels.
("Selections"..."Modify"..."Contract"..."Contract by 2 pixels")
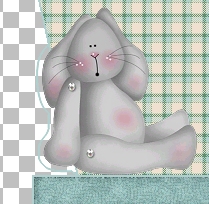
Hit the "Delete" key. De-select. Use your eraser tool to erase all of the bunny
outline except what extends outside of the flower pot card. Your image should
now look something like this:

*Add a new raster layer.*
Apply Jane's egg tubes, each in their own layer. Rotate, if desired. Don't
forget to sharpen if you re-size or rotate.
When you have your decorations placed just like you want them,
*Add a new raster layer.*
Add your text, "Happy Easter!" or whatever Easter greeting you desire to the top
of the pot. I used the same solid color
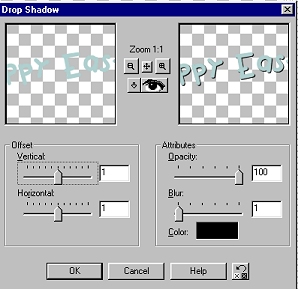
(#ACD1CE) with a drop shadow
("Image"..."3-D Effects"..."Drop Shadow" using these settings:

Export your image as a .jpg with a compression of "1."
The varieties of cards are only limited to your imagination. You are welcome to
print my other 10 designs by following wompie.

