|

Page 2
Open a new image, 500 x 500, transparent background.
*Add a new raster layer.*
Set your foreground and background color to something bright and "sunshiney."
I used #E57C0B.
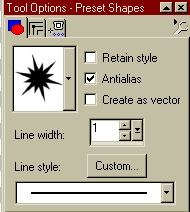
Use your Preset Shapes tool set to "Star 4", antialias checked, line width
1 to draw a large star. Don't worry about an exact size, you can always
adjust later, if necessary. To make the star centered on your image, copy this
layer and paste as a new layer, then delete layer 2.

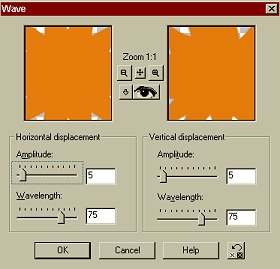
Make sure you are working in the layer with the star shape. Apply the wave
filter to the star ("Effects"..."Geometric Effects"..."Wave") using a
Horizontal and Vertical Displacement Amplitude of "5" and wavelength of
"75."

Sharpen the layer once. ("Effects"..."Sharpen"..."Sharpen")
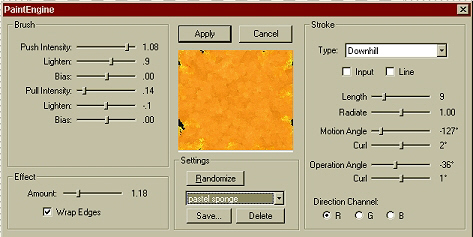
If you have Fantastic Machines Paint Engine, you might want to apply the
Pastel Sponge preset at this time. I use my selection tool to draw a
rectangle outside the star shape, click once inside to select the star,
then apply the filter. ("Effects"..."Plug-in Filters"..."Fantastic
Machines"..."Paint Engine"..."Pastel Sponge")

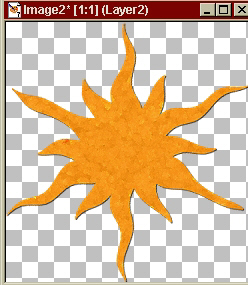
Your image should now look something like this:

*Note* There are two "Star 4" shapes. Make sure you are using the special
one. (see screen shot above)
Now, we will make the rays come alive! Copy this layer ("Ctrl"..."C") and
paste it as a new layer. ("Ctrl"..."L") Rotate this layer 15 degrees to
the left. ("Image"..."Rotate"..."Left" checked..."Free" checked...Type in
"15"...Click "OK") Sharpen once. Paste another star ("Ctrl"..."L") and
rotate by "30." Sharpen once. Paste another star and rotate by "45."
Sharpen once. Paste another star and rotate by "60." Sharpen once. Paste
another star and rotate by "75." Sharpen once. Paste another star and
rotate by "90." Sharpen once.


|