|
Go to your top layer in your Layer
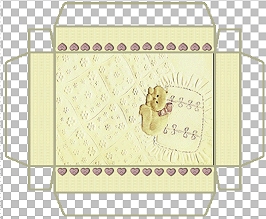
pallette. Apply your wompiecountrybutton tube scaled at 10 (or a tube of your choice). Sharpen once. I added a drop shadow to mine. I then copied ("Ctrl"..."C") this layer and pasted as a new layer ("Ctrl"..."L") until I had a row of buttons along the rim of my box. Then, make all of the other layers invisible by clicking the eyeglasses in your Layers Pallete. Make sure one of the button layers is selected, then merge visible layers. ("Layers"..."Merge"..."Visible") **NOTE: You will be able to line up your hearts better once you see the grid on the invisible background, too.** Make all your layers visible in the Layers Pallette again. Copy the merged layer and paste it as a new layer. Flip and place at the other rim of your box top. Your image should now look like this: (image size reduced for faster loading)
Now, copy and paste as a new layer again. Rotate using the same settings as before. Sharpen once. Place this row of heart buttons on the right-hand rim side. Since the row is too long for these sides, I used my selection tool, rectangle, no feather, antialias checked, to select four of the buttons, then hit my "delete" key to size this row to fit. Then, copy, paste as a new layer, mirror, and add a row to the left-hand rim. Your box top is now complete! Export as a .jpg image, compression "1." See mine here. For
the box bottom, work with an image 683 x 543 and load the jewelry box bottom selection.
Use the same techniques as you used on the box top with filling the selection,
using your tile to fill the bottom and sides, and trimming your box bottom. Keep
in mind that the lid will cover about half of the sides of the bottom when
adding trim. See my completed box bottom here. Print on heavy index stock paper, cut out, fold, tuck, glue and enjoy! |


