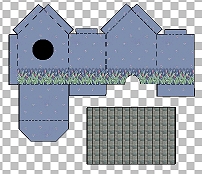
Make Layer 2 active. (The layer with the Selection) Use the magic wand tool to click inside the roof outline. Expand by 2 pixels. (Selection...modify...expand) Add a new raster layer. Minimize this image and open one of the roof tiles. Choose one to match the birdhouse. I chose this one:
Re-size the tile by 50%. Rotate 90 degrees to the right. Sharpen image. Minimize the tile and go back to your birdhouse. Flood fill the roof with your tile. De-select. ("Ctrl"..."D") Your image should now look something like this: (image re-sized for faster loading)
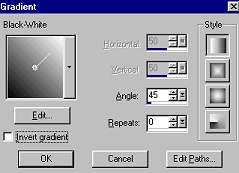
**NOTE** I decided to move my merged border layer to the bottom of the box. I then erased the overlap in the arch tab portion. Now let's make our outline a little less noticeable. Go back to layer 2, your birdhouse outline layer. Use your magic wand to select any of the black lines. Go to "selections...modify...select similar." Flood-fill the black lines with a color just a little darker than your background fill. For this box, I used #54668A. Now, in this same layer, use your magic wand tool to click inside the hole in the birdhouse to select. Add a new raster layer. Flood fill with white. Contract by 3 pixels. (Selections...modify...contract) Hit the "delete" key. De-select. ("Ctrl"..."D") Use your magic wand tool to select only the white outline of the hole. Flood-fill with your color of choice or you may want to use a BladePro pre-set. I used CC sparkly pink on mine. De-select. Now go back to layer 2 (your birdhouse outline) and select the inside of the hole by clicking on the blue part. Add a new raster layer. Flood-fill with a linear gradient or your color of choice. I used these settings:
De-select. Voila! Your image is now ready to export as .jpg with a compression of 1. Make sure to add instructions for printing. **NOTE** Two holes in the roof at the apex make your box ready for hanging, too. See my birdhouse boxes ready for printing on the next pages. Follow wompie!
|


